
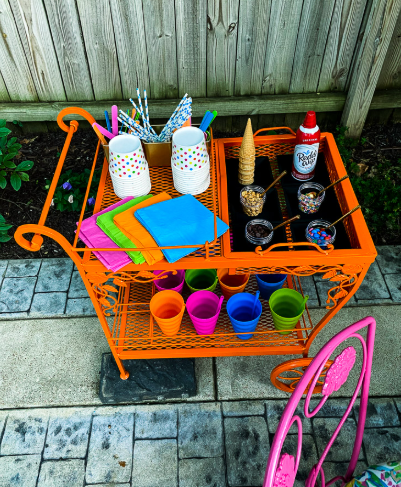
If you’re looking to breathe new life into your outdoor spaces, DIY painted patio furniture with a vintage style can be both rewarding and enjoyable. This project not only adds charm to your patio but also allows you to personalize your furniture according to your taste and garden themes.
1. Choosing the Right Furniture
Before diving into the painting process, it’s essential to select the right type of furniture. Vintage-style pieces often embody unique designs and timeless aesthetics, making them ideal for a retro feel. Look for items made of durable materials like metal, wood, or wicker, as these can withstand the elements better and provide a solid foundation for your creative efforts.
Consider visiting thrift stores, flea markets, or online platforms where you can find pre-loved furniture at an affordable price. Look for items with character—think ornate wrought iron tables or rustic wooden chairs. It’s also helpful to search for pieces that have some wear, as these can add to the vintage charm after they are restored and painted.
-
- Visit local thrift stores and flea markets.
-
- Check online marketplaces for second-hand furniture.
-
- Look for items that show some wear for authenticity.
-
- Choose durable materials like metal or wood.
2. Preparing for the Paint Job
Once you’ve chosen your furniture, preparation is key for a successful paint job. Start by cleaning the surfaces thoroughly to remove dirt, grease, and any existing finishes. Use a mild detergent and water, followed by a rinse and a thorough drying. If the furniture is particularly glossy, lightly sand it to help the paint adhere better.
After cleaning, consider applying a primer suited for outdoor conditions. This will not only enhance the paint color but also help protect the furniture from moisture and UV rays. Additionally, select high-quality outdoor paint for the best results, opting for colors that amplify the vintage feel, like soft pastels or muted hues.
-
- Clean surfaces with a mild detergent and water.
-
- Lightly sand glossy surfaces for better paint adhesion.
-
- Apply a primer suitable for outdoor furniture.
-
- Choose high-quality outdoor paint in vintage colors.
3. The Painting Process
When it’s time to paint, ensure you do so in a well-ventilated, dry area for optimal results. Outdoor furniture is best painted during mild weather, avoiding extremely hot or humid days, which can affect drying time and finish. Using a brush or roller, apply the paint in thin, even coats. For intricate designs, consider using a spray paint that allows for precise application.
Always let each coat dry completely before applying the next, as this avoids drips and ensures a smoother finish. Depending on the color and the coverage needed, you might need two to three coats. After the final coat, allow the furniture to cure for a few days; this will help the paint set properly and increase durability.
-
- Paint in a well-ventilated, dry area.
-
- Avoid extreme weather conditions while painting.
-
- Use thin, even coats for the best finish.
-
- Let each coat dry completely before applying the next.
4. Finishing Touches and Maintenance
After you’ve carefully painted your furniture, it’s time to add the finishing touches. Consider applying a clear outdoor sealant for added protection against the elements. This helps prolong the life of your paint job and keeps your furniture looking fresh. Additionally, adding vintage-style cushions or throws can enhance the aesthetic while keeping you comfortable.
Maintenance is crucial for extending the life of your newly painted furniture. Regular cleaning and positioning the items in a protective spot during inclement weather can significantly improve durability. If you notice any chips in the paint, address them promptly to prevent rust or wood deterioration.
-
- Apply a clear outdoor sealant for added protection.
-
- Enhance aesthetics with vintage-style cushions and throws.
-
- Maintain by regularly cleaning furniture.
-
- Store items away during inclement weather.
-
- Address paint chips promptly to prevent deterioration.
5. Showcasing Your Creativity
After completing your vintage-style painted patio furniture, don’t hesitate to showcase your creativity! Arrange your new pieces in a way that optimizes your outdoor space. Add planters, string lights, or an outdoor rug to enhance the vibe and make your patio a cozy retreat. Consider creating a themed area, such as a reading nook or a small dining space, to add functionality along with style.
Sharing your DIY project on social media platforms can inspire others to embark on their own furniture revamping journey. Remember, DIY projects can be a conversation starter—don’t shy away from asking friends for their feedback or inviting them over to enjoy your revamped outdoor space.
-
- Arrange your furniture to maximize your outdoor space.
-
- Add decorative elements like planters or string lights.
-
- Create themed areas for functionality and style.
-
- Share your project on social media for inspiration.
Now that you’re equipped with practical tips, it’s time to get started on your DIY painted patio furniture project. Embrace your creativity and make your outdoor space a reflection of your unique style! Remember to take your time and enjoy the process for a result you’ll be proud of for years to come.